Configure a beautiful terminal on Unix with Zsh
See how you can configure a beautiful terminal on Unix with Zsh and Oh-My-Zsh
Series · GNU/Linux Environment for Developers
Post 3 of 8
Series · GNU/Linux Environment for Developers
Post 3 of 8
- My beautiful Linux development environment
- Must have GNOME extensions
- Configure a beautiful terminal on Unix with Zsh
- My VS Code setup - Making the most out of VS Code
- The state of Linux as a daily use OS in 2021
- My sleek and modern Linux development machine in 2021
- My fully offline AI-assisted Linux development machine
- Introducing LlamaStash: a zero-overhead, terminal-native llama.cpp launcher
I was a long-time Windows user, a fairly happy one, but as a developer, there were a lot of things that were missing for me and one of the main was the terminal experience. I’m not a fan of the closed ecosystem of Apple so GNU/Linux was an easy choice for me and I switched to Linux almost 3 years ago. I did start out with Ubuntu and later switched to Fedora which is my primary OS now. You can read about my setup here
As a senior developer and open source community lead, I spent a lot of time on the terminal and a terminal with a nice developer experience instantly makes you happier and more productive. The default bash terminal is good for beginners but if you really want a powerful terminal you need something more than bash.
Let’s see how to configure a powerful and productive terminal experience. The setup is based on what I have configured on my Fedora machine. The same setup can be recreated on any other Linux distribution, BSD or Mac as well. You just need to use the installation instruction from the tools for the given platform.

Below are the tools we would need for this.
Zsh
Zsh is one of the most feature-rich shells for Unix. It works on Linux, Mac, WSL, and BSD. There are alternatives like Fish which also offers similar features but I personally like Zsh.
-
Check if Zsh is already installed by running
zsh --versionon your terminal. If not found, install it using your package manager.- Fedora:
sudo dnf install zsh - Mac:
brew install zsh zsh-completions - RHEL/CentOS:
sudo yum update && sudo yum -y install zsh - Ubuntu/Debian:
sudo apt install zsh - For other platform refer this
- Fedora:
-
Now make Zsh your default shell by running
chsh -s $(which zsh). -
Log out and log in back again to use your new default shell.
-
Test that it worked with echo
$SHELL. Expected result:/bin/zshor similar. -
Test with
$SHELL --version. Expected result:zsh 5.6.2or similar
Note: If you have installed Zsh for the first time and launch the shell it would prompt you to configure some settings. You can choose to ignore that by hitting q as we will configure it later on.
Oh-My-Zsh
Oh-My-Zsh gives the Zsh shell superpowers. Its a framework to manage Zsh configuration. It has plugins and themes for Zsh(A lot of them).
From their Github page:
Once installed, your terminal shell will become the talk of the town or your money back! With each keystroke in your command prompt, you’ll take advantage of the hundreds of powerful plugins and beautiful themes. Strangers will come up to you in cafés and ask you, “that is amazing! are you some sort of genius?”
Just install it. You need it :)
sh -c "$(curl -fsSL https://raw.githubusercontent.com/robbyrussell/oh-my-zsh/master/tools/install.sh)"Terminal emulator/multiplexer
Optionally you can use a Terminal emulator that can manage windows and panes for you.
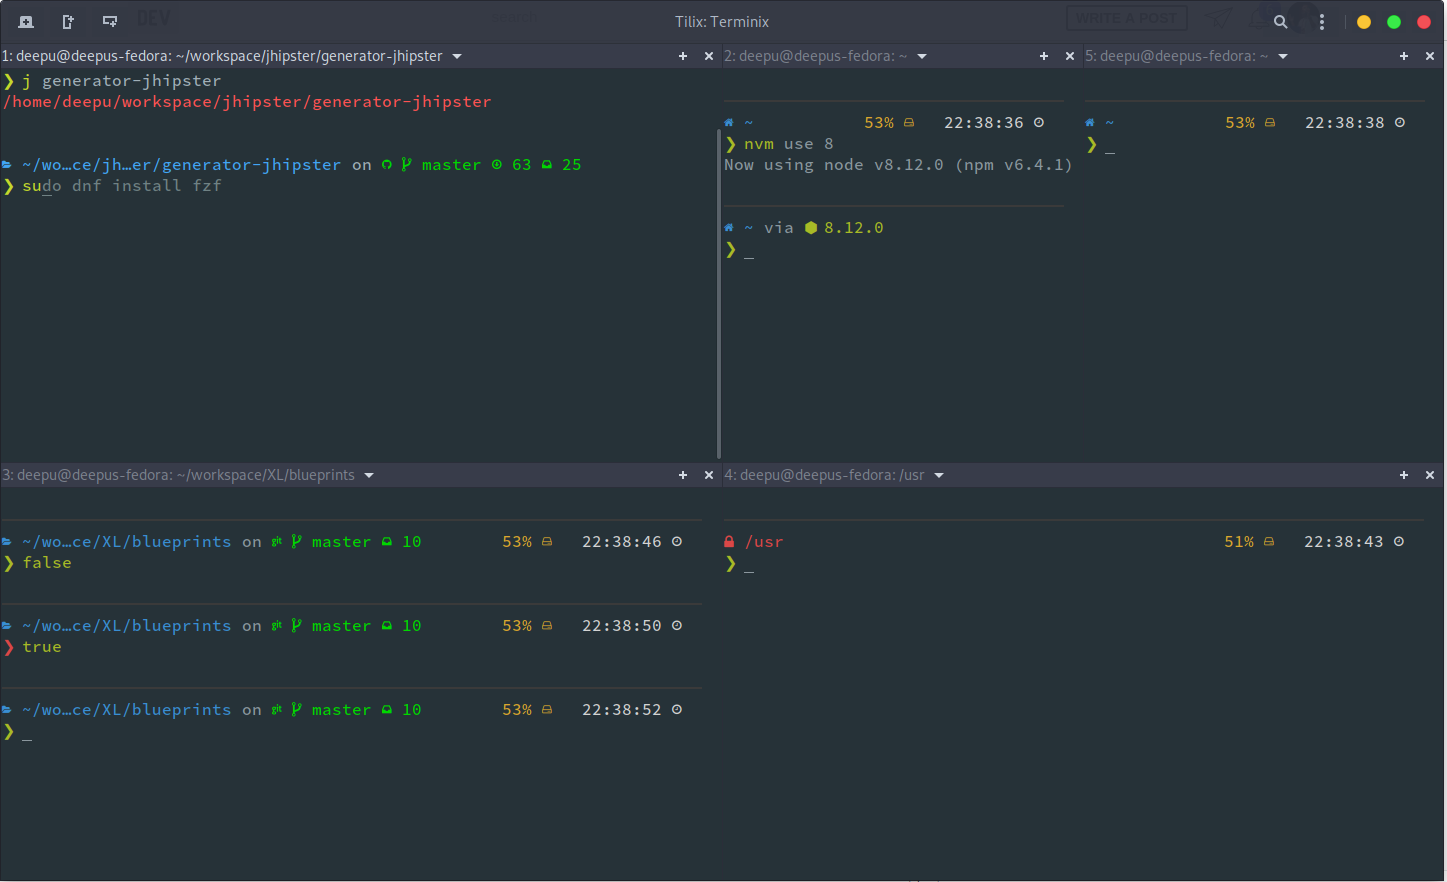
For Linux I would recommend using Tilix, I have been using it for 3 years and its just amazing.
For Mac, you can use iTerm2 which is very popular.
Alternatively, you can also use tmux if you want something lighter on your existing Terminal app on Linux, BSD or Mac.
Configuring Zsh
This is the fun part. Let us make the terminal awesome.
Install plugins
First, let us install some additional plugins that are not bundled with Oh-My-Zsh.
zsh-autosuggestions
Provides auto completion for shell commands.
Run git clone https://github.com/zsh-users/zsh-autosuggestions ${ZSH_CUSTOM:-~/.oh-my-zsh/custom}/plugins/zsh-autosuggestions to install
zsh-syntax-highlighting
Provides syntax highlighting on the shell.
Run git clone https://github.com/zsh-users/zsh-syntax-highlighting.git ${ZSH_CUSTOM:-~/.oh-my-zsh/custom}/plugins/zsh-syntax-highlighting to install
autojump
Provides a smarter directory navigation system. Install autojump for your OS following instructions here.
Now let us configure the ~/.zshrc file with some settings. Here is my full .zshrc file. Your mileage may vary.
Add exports
We will start with some exports.
export TERM="xterm-256color" # This sets up colors properly
# set shellexport SHELL=/usr/bin/zsh
# If you come from bash you might have to change your $PATH.export NODE_PATH=$NODE_PATH:$HOME/.npm-global/lib/node_modulesexport JAVA_HOME=/usr/java/latestexport PATH=$JAVA_HOME/bin:~/.npm-global/bin:$HOME/bin:/usr/local/bin:$PATH
# Add exports from your profilesource ~/.profile# Path to your oh-my-zsh installation.export ZSH=$HOME/.oh-my-zshZsh settings
Now we can configure some Zsh specific settings
DISABLE_MAGIC_FUNCTIONS=trueZSH_AUTOSUGGEST_MANUAL_REBIND=1COMPLETION_WAITING_DOTS=trueDISABLE_UNTRACKED_FILES_DIRTY=trueZsh theme
Now, Let’s set up a nice theme. I’m using powerlevel10k as my current theme and it’s fast and looks great. You can use the default or you can choose any theme you like from the list here. If you like my theme then follow these instructions. Thanks to Roman Perepelitsa for some cool tips
Run git clone https://github.com/romkatv/powerlevel10k.git ${ZSH_CUSTOM:-~/.oh-my-zsh/custom}/themes/powerlevel10k to install the theme.
Install a Powerline font. I use Adobe Source Code Pro
Add the below configuration to the ~/.zshrc file.
# Set name of the theme to load. Optionally, if you set this to "random"# it'll load a random theme each time that oh-my-zsh is loaded.# See https://github.com/robbyrussell/oh-my-zsh/wiki/ThemesZSH_THEME="powerlevel10k/powerlevel10k"
############ POWERLEVEL THEME SETTINGS ##############POWERLEVEL9K_MODE='awesome-fontconfig'
POWERLEVEL9K_LEFT_PROMPT_ELEMENTS=(dir vcs nvm)POWERLEVEL9K_RIGHT_PROMPT_ELEMENTS=(disk_usage time)
POWERLEVEL9K_PROMPT_ADD_NEWLINE=truePOWERLEVEL9K_PROMPT_ON_NEWLINE=truePOWERLEVEL9K_SHOW_RULER=truePOWERLEVEL9K_RULER_CHAR='─'POWERLEVEL9K_RULER_BACKGROUND=nonePOWERLEVEL9K_RULER_FOREGROUND=237
POWERLEVEL9K_LEFT_SEGMENT_END_SEPARATOR=POWERLEVEL9K_LEFT_SEGMENT_SEPARATOR=POWERLEVEL9K_LEFT_SUBSEGMENT_SEPARATOR=' 'POWERLEVEL9K_RIGHT_SEGMENT_END_SEPARATOR=POWERLEVEL9K_RIGHT_SEGMENT_SEPARATOR=POWERLEVEL9K_RIGHT_SUBSEGMENT_SEPARATOR=POWERLEVEL9K_WHITESPACE_BETWEEN_LEFT_SEGMENTS=
POWERLEVEL9K_SHORTEN_DIR_LENGTH=2POWERLEVEL9K_SHORTEN_STRATEGY="truncate_middle"
POWERLEVEL9K_DIR_SHOW_WRITABLE=true
POWERLEVEL9K_DISK_USAGE_NORMAL_BACKGROUND=nonePOWERLEVEL9K_DISK_USAGE_WARNING_BACKGROUND=magentaPOWERLEVEL9K_DISK_USAGE_CRITICAL_BACKGROUND=redPOWERLEVEL9K_TIME_BACKGROUND=nonePOWERLEVEL9K_TIME_FOREGROUND=white
POWERLEVEL9K_DIR_HOME_BACKGROUND=nonePOWERLEVEL9K_DIR_HOME_SUBFOLDER_BACKGROUND=nonePOWERLEVEL9K_DIR_ETC_BACKGROUND=nonePOWERLEVEL9K_DIR_DEFAULT_BACKGROUND=nonePOWERLEVEL9K_DIR_NOT_WRITABLE_BACKGROUND=none
POWERLEVEL9K_DIR_HOME_FOREGROUND=bluePOWERLEVEL9K_DIR_HOME_SUBFOLDER_FOREGROUND=bluePOWERLEVEL9K_DIR_ETC_FOREGROUND=bluePOWERLEVEL9K_DIR_DEFAULT_FOREGROUND=bluePOWERLEVEL9K_DIR_NOT_WRITABLE_FOREGROUND=red
POWERLEVEL9K_OS_ICON_BACKGROUND="white"POWERLEVEL9K_OS_ICON_FOREGROUND="blue"
POWERLEVEL9K_VCS_GIT_ICON='%fon %F{040}\uf1d3 'POWERLEVEL9K_VCS_GIT_GITHUB_ICON='%fon %F{040}\uf09b 'POWERLEVEL9K_VCS_GIT_BITBUCKET_ICON='%fon %F{040}\uf171 'POWERLEVEL9K_VCS_GIT_GIT_GITLAB_ICON='%fon %F{040}\uf296 '
POWERLEVEL9K_VCS_CLEAN_BACKGROUND=nonePOWERLEVEL9K_VCS_UNTRACKED_BACKGROUND=nonePOWERLEVEL9K_VCS_MODIFIED_BACKGROUND=nonePOWERLEVEL9K_VCS_LOADING_BACKGROUND=nonePOWERLEVEL9K_VCS_CLEAN_FOREGROUND="040"POWERLEVEL9K_VCS_UNTRACKED_FOREGROUND="red"POWERLEVEL9K_VCS_MODIFIED_FOREGROUND="yellow"POWERLEVEL9K_VCS_LOADING_FOREGROUND="grey"
POWERLEVEL9K_VCS_UNTRACKED_ICON=$'%{\b?%}'POWERLEVEL9K_VCS_UNSTAGED_ICON=$'%{\b!%}'POWERLEVEL9K_VCS_STAGED_ICON=$'%{\b+%}'
POWERLEVEL9K_DIR_NOT_WRITABLE_VISUAL_IDENTIFIER_COLOR=redPOWERLEVEL9K_LOCK_ICON=$'\uf023'
POWERLEVEL9K_MULTILINE_FIRST_PROMPT_PREFIX=''local p='%F{ %(?.green.red)}${${${KEYMAP:-0}:#vicmd}:+❯}${${$((!${#${KEYMAP:-0}:#vicmd})):#0}:+❮}%f 'POWERLEVEL9K_MULTILINE_LAST_PROMPT_PREFIX="$p"
POWERLEVEL9K_NVM_BACKGROUND=nonePOWERLEVEL9K_NVM_FOREGROUND=greenPOWERLEVEL9K_NODE_ICON='%fvia %F{green}⬢'
############ END- POWERLEVEL THEME SETTINGS ##############Enable plugins
We can finish off by enabling the plugins and some tweaks
plugins=(zsh-autosuggestions git docker docker-compose autojump zsh-syntax-highlighting dnf npm)
source $ZSH/oh-my-zsh.shAnd that’s it we are ready. Start a new terminal session and enjoy.
Issues & workarounds
If you use Tilix as your terminal emulator, then this might be required for proper pane splitting. Add this to your ~/.zshrc
if [[ $TILIX_ID ]]; then source /etc/profile.d/vte.shfiIf you are getting errors from the zsh-completion plugin, you might want to add this to the beginning of your ~/.zshrc
# workaround as per https://superuser.com/questions/1222867/zsh-completion-functions-brokenFPATH=$HOME/.oh-my-zsh/plugins/git:$HOME/.oh-my-zsh/functions:$HOME/.oh-my-zsh/completions:/usr/share/zsh/site-functions:/usr/share/zsh/$ZSH_VERSION/functions
export FPATHIf you encounter an error from Oh-My-Zsh saying [oh-my-zsh] Insecure completion-dependent directories detected, set ZSH_DISABLE_COMPFIX=true right before the line source $ZSH/oh-my-zsh.sh in your ~/.zshrc file and restart your session or run exec zsh
Dockerized playground.
If you have Docker installed then you can use the below snippet to try this setup in a sandbox without installing anything or affecting your existing setup.
docker run -e LANG=C.UTF-8 -e LC_ALL=C.UTF-8 -e TERM=$TERM -it --rm ubuntu bash -uexc ' apt update && apt install -y git curl zsh autojump && cd /root sh -c "$(curl -fsSL https://raw.githubusercontent.com/robbyrussell/oh-my-zsh/master/tools/install.sh)" --skip-chsh --unattended git clone https://github.com/zsh-users/zsh-autosuggestions ${ZSH_CUSTOM:-~/.oh-my-zsh/custom}/plugins/zsh-autosuggestions git clone https://github.com/zsh-users/zsh-syntax-highlighting.git ${ZSH_CUSTOM:-~/.oh-my-zsh/custom}/plugins/zsh-syntax-highlighting git clone https://github.com/romkatv/powerlevel10k.git ${ZSH_CUSTOM:-~/.oh-my-zsh/custom}/themes/powerlevel10k curl -fsSLO http://bit.ly/Spaceship10kTheme echo "source ~/Spaceship10kTheme" >~/.zshrc exec zsh'VSCode Tip
If you are using VSCode like me, you might want to do the below to get the same terminal experience in the integrated VSCode terminal as well.

Follow these steps
- Download and install a patched font.
- On Linux, run
fc-cache -f -vto refresh font cache. - On VSCode, open Preferences → Settings and click on the
{}icon to open JSON mode and set the below
"terminal.integrated.shell.linux": "/usr/bin/zsh", "terminal.integrated.fontFamily": "'SauceCodePro Nerd Font Mono','Source Code Pro'", "terminal.integrated.rightClickCopyPaste": true, "terminal.integrated.fontSize": 14, "terminal.integrated.cursorStyle": "underline", "terminal.integrated.cursorBlinking": trueReplace linux with osx if you are on a Mac.
I hope you like it. If you have any questions or if you think I missed something please add a comment.
If you like this article, please leave a like or a comment.
You can follow me on Twitter and LinkedIn.